
Getting started with KanPlan
Five minutes from empty board to a week that plans itself.
1. Create a project
Click + New project in the header, give it a name and a color. Each project becomes a column on your board — most people start with something like Work, Home, and Personal.
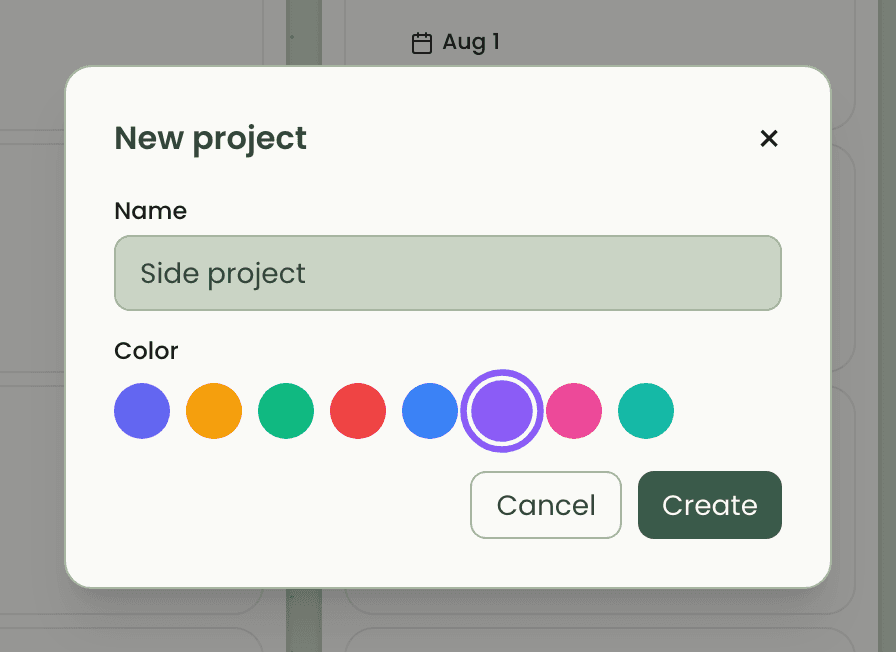
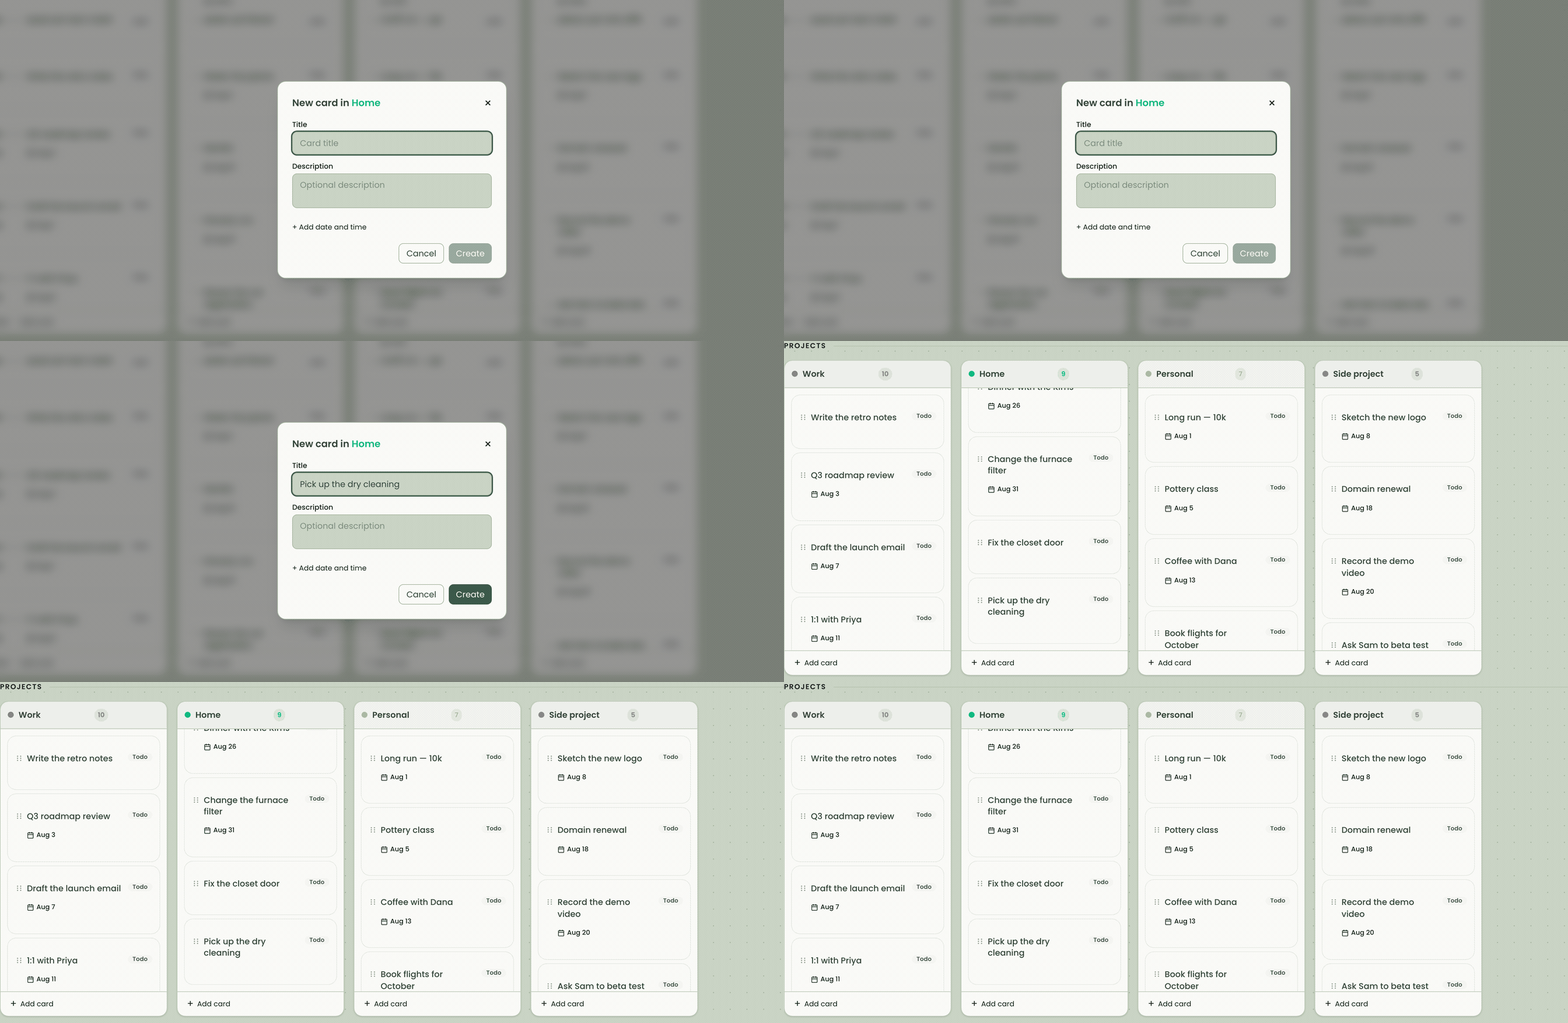
2. Add cards
Add a card to any column for each task or event. Open a card to give it a description and a due date — dated cards automatically appear on the calendar below the board. Drag cards between columns or reorder them as priorities shift.
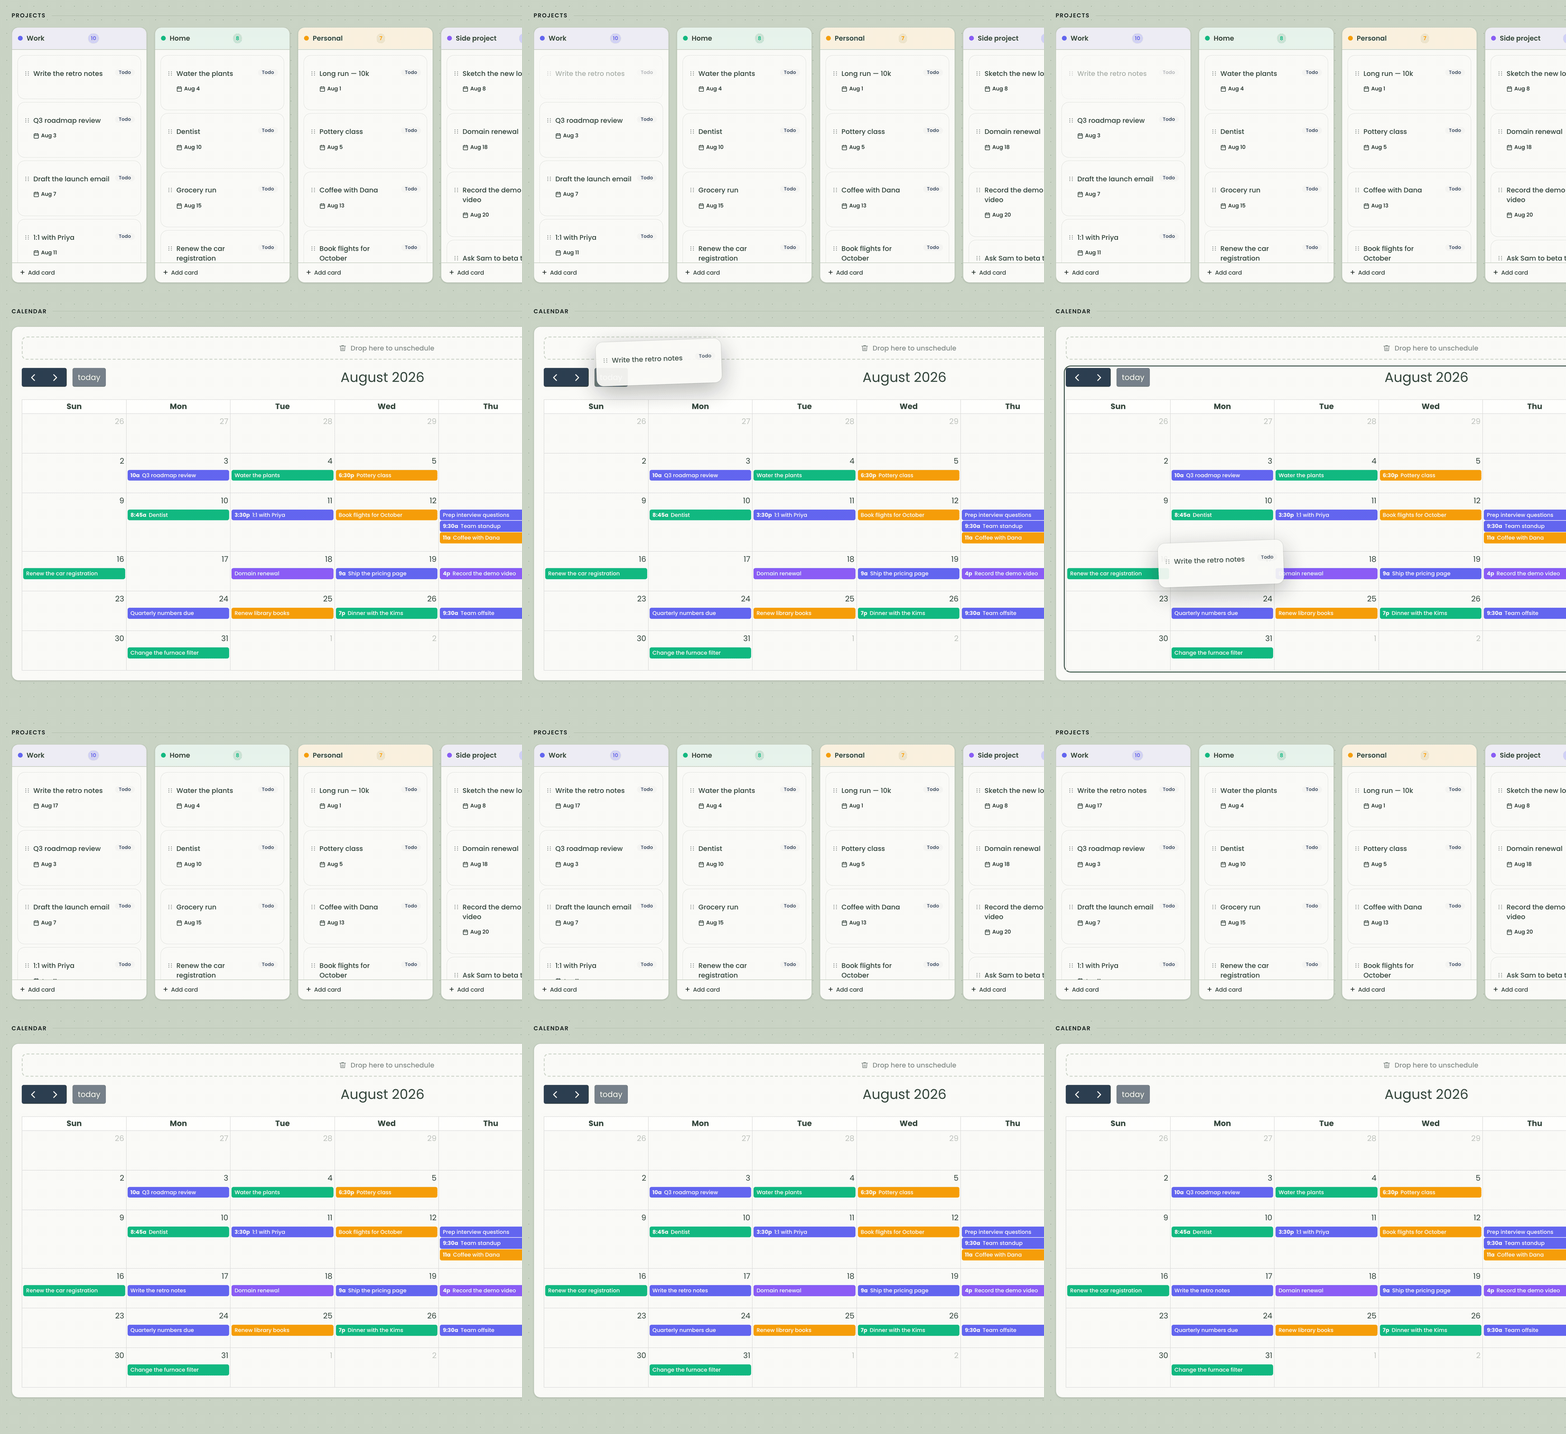
3. Drag cards onto the calendar
A card doesn’t need its date typed in. Drag it from its column straight onto a calendar day and it’s scheduled there. Drag it to another day to reschedule, or onto the “Drop here to unschedule” bar above the calendar to clear the date.
Where you grab matters: drag the card body to send a card to the calendar. The six-dot grip on its left edge is for reordering within the kanban — grab that instead when you want to move the card up, down, or into another column.
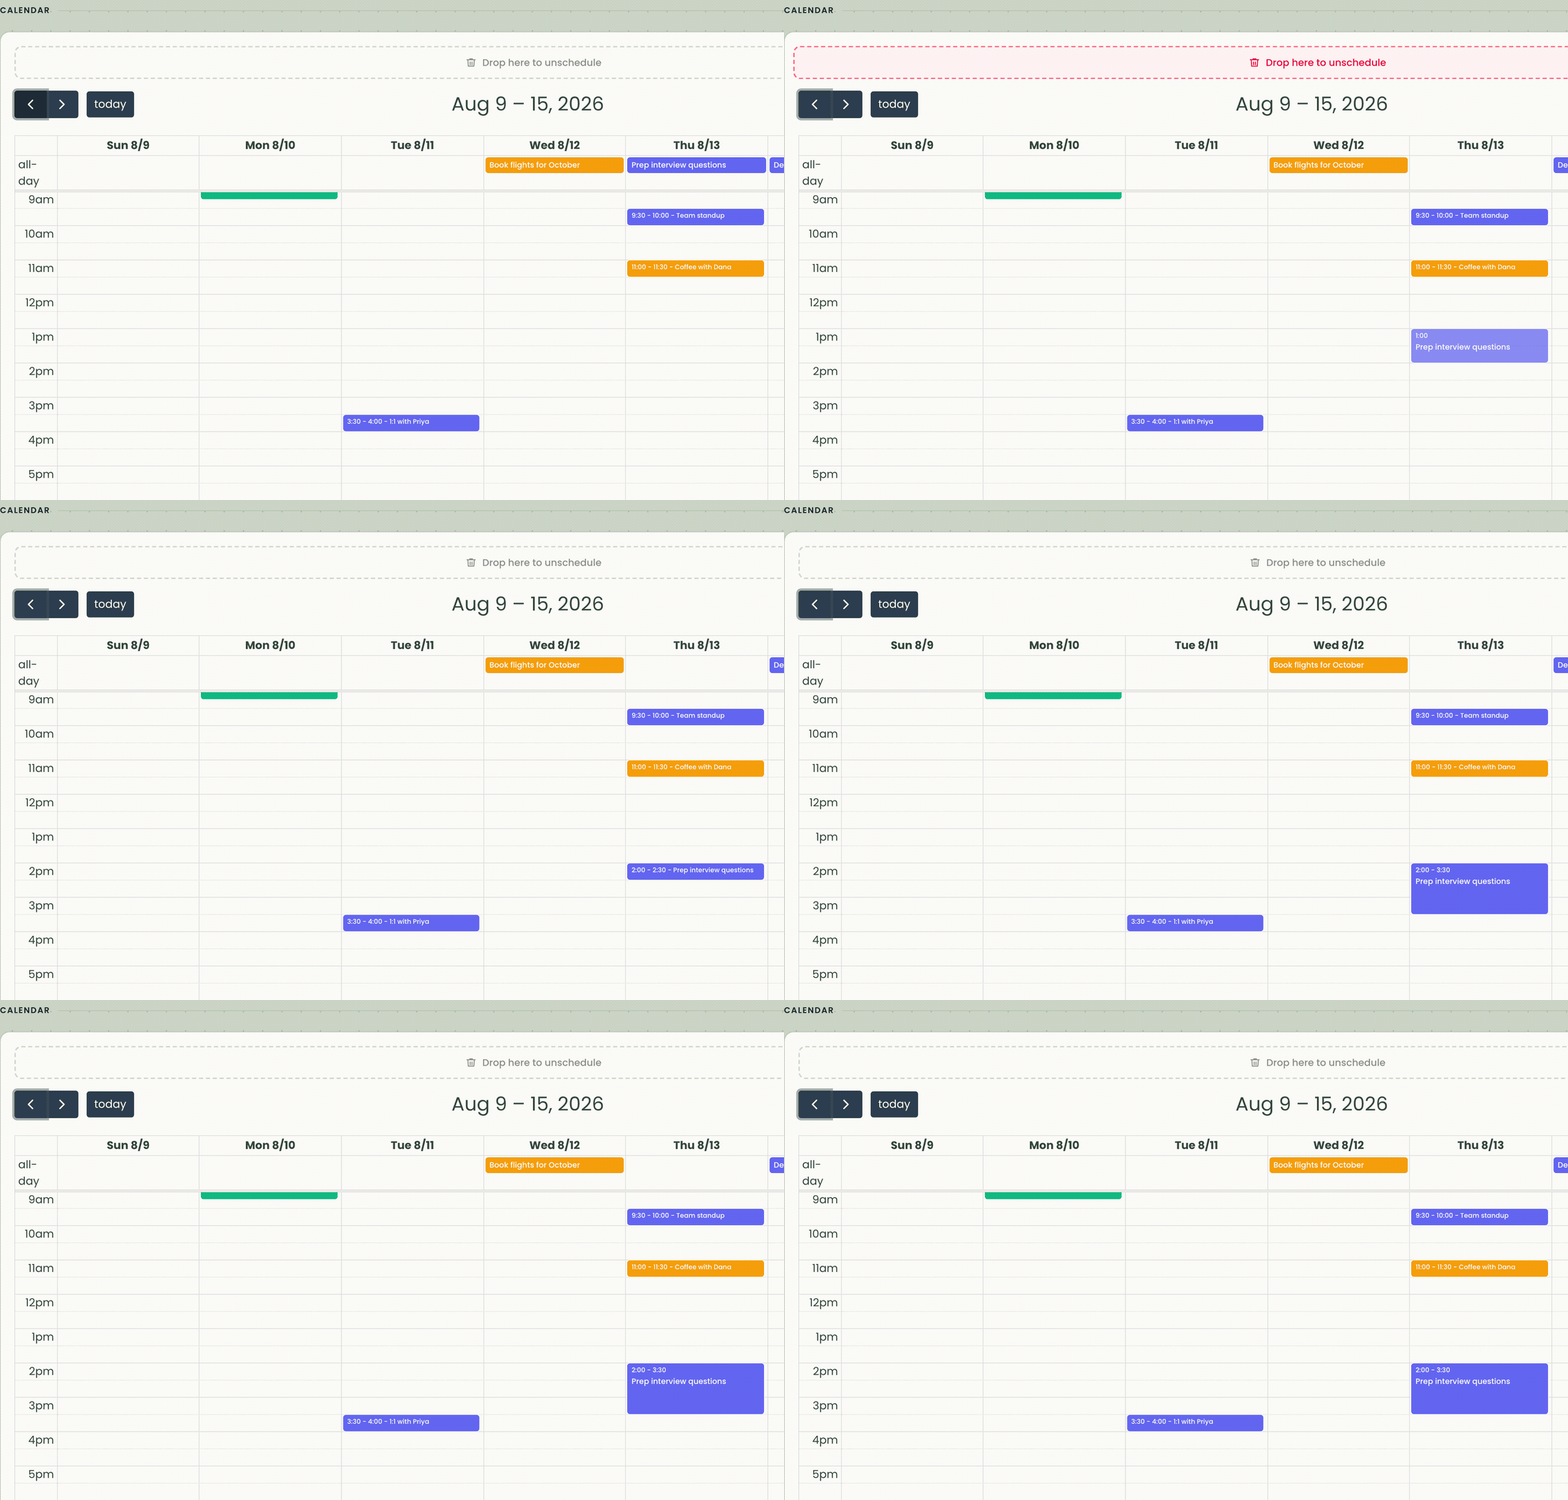
The week and day views go one step further: drag a card out of the all-day lane and drop it on a time. It books a half-hour slot alongside whatever else the day holds, and you can stretch it by dragging its bottom edge.
4. Make things repeat
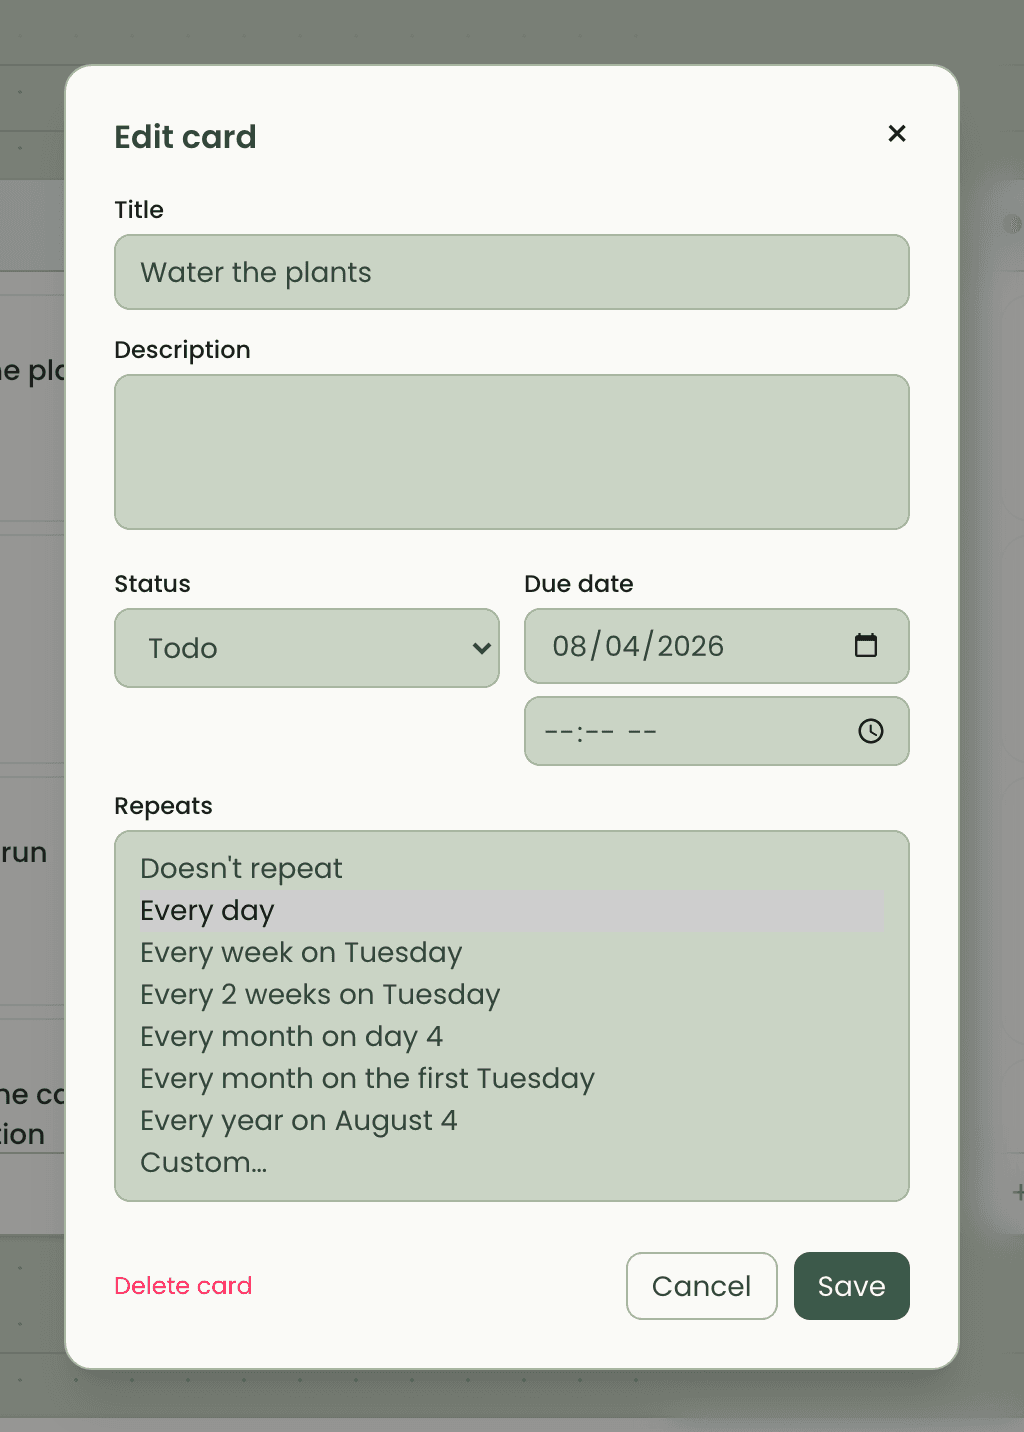
For anything you do on a schedule, set a repeat rule when editing the card — daily, weekly, monthly, or a custom pattern. KanPlan generates the upcoming occurrences for you. Delete a single occurrence and it stays gone without breaking the series.
5. Mark things done
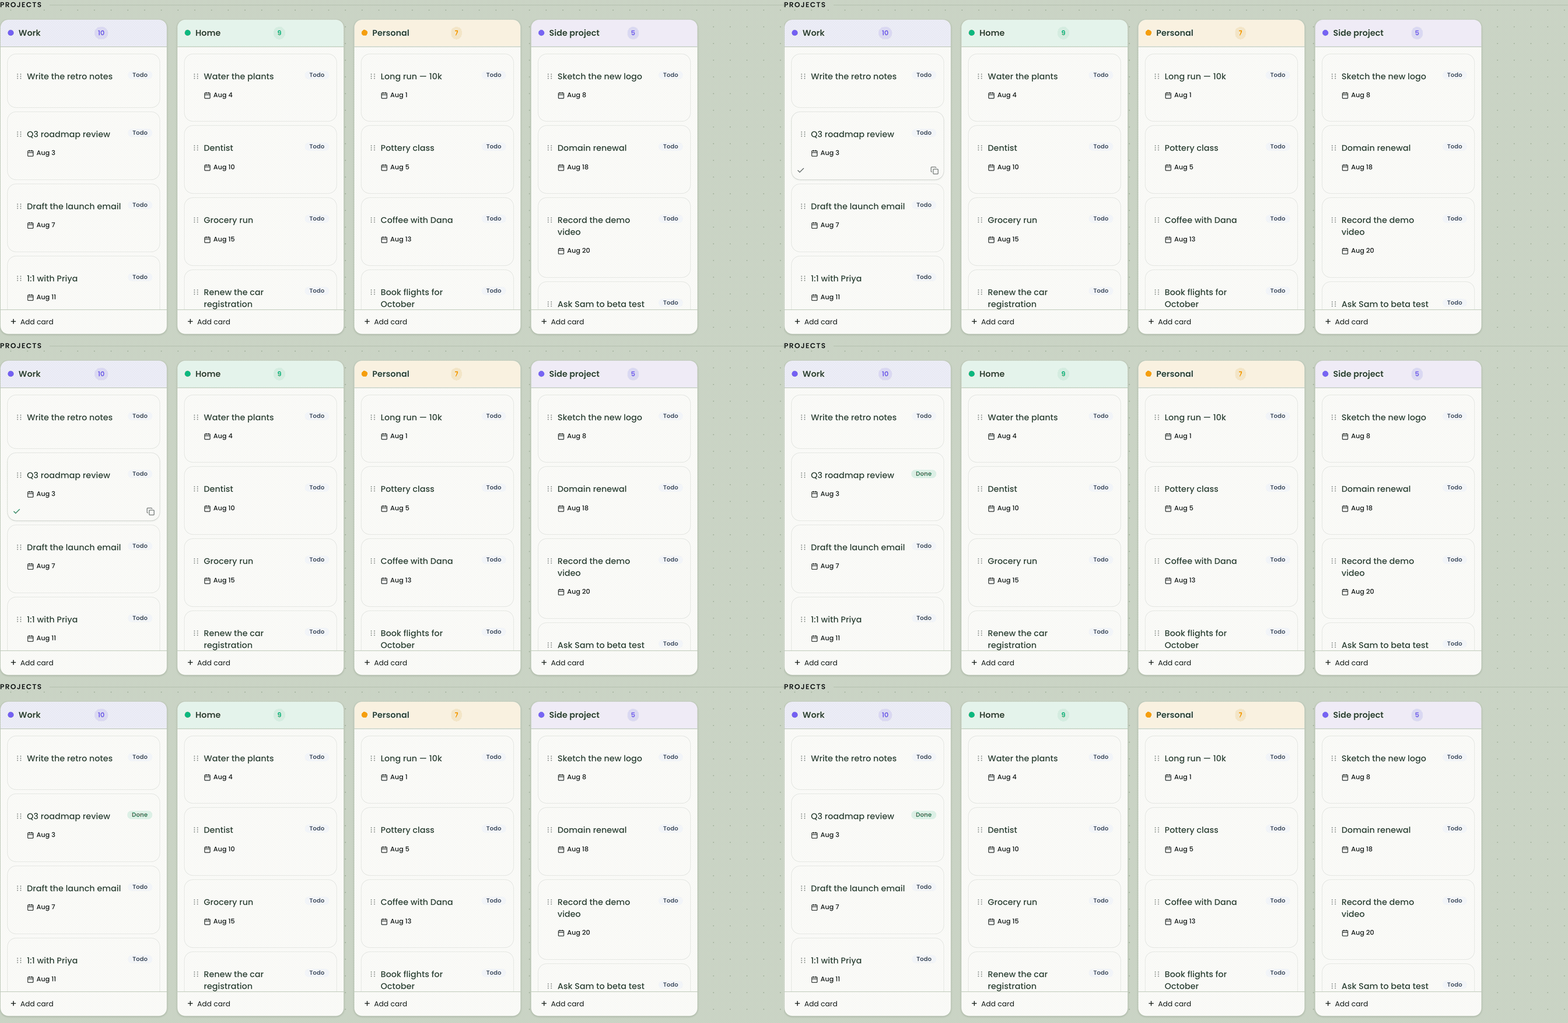
Hover a card and hit the check to mark it done — its badge flips to Done and its entry on the calendar dims. Need an in-between state? Open the card and set its status to In Progress. And if finished cards start to clutter a column, there’s a setting to hide them from the board entirely.

6. Tune it in settings
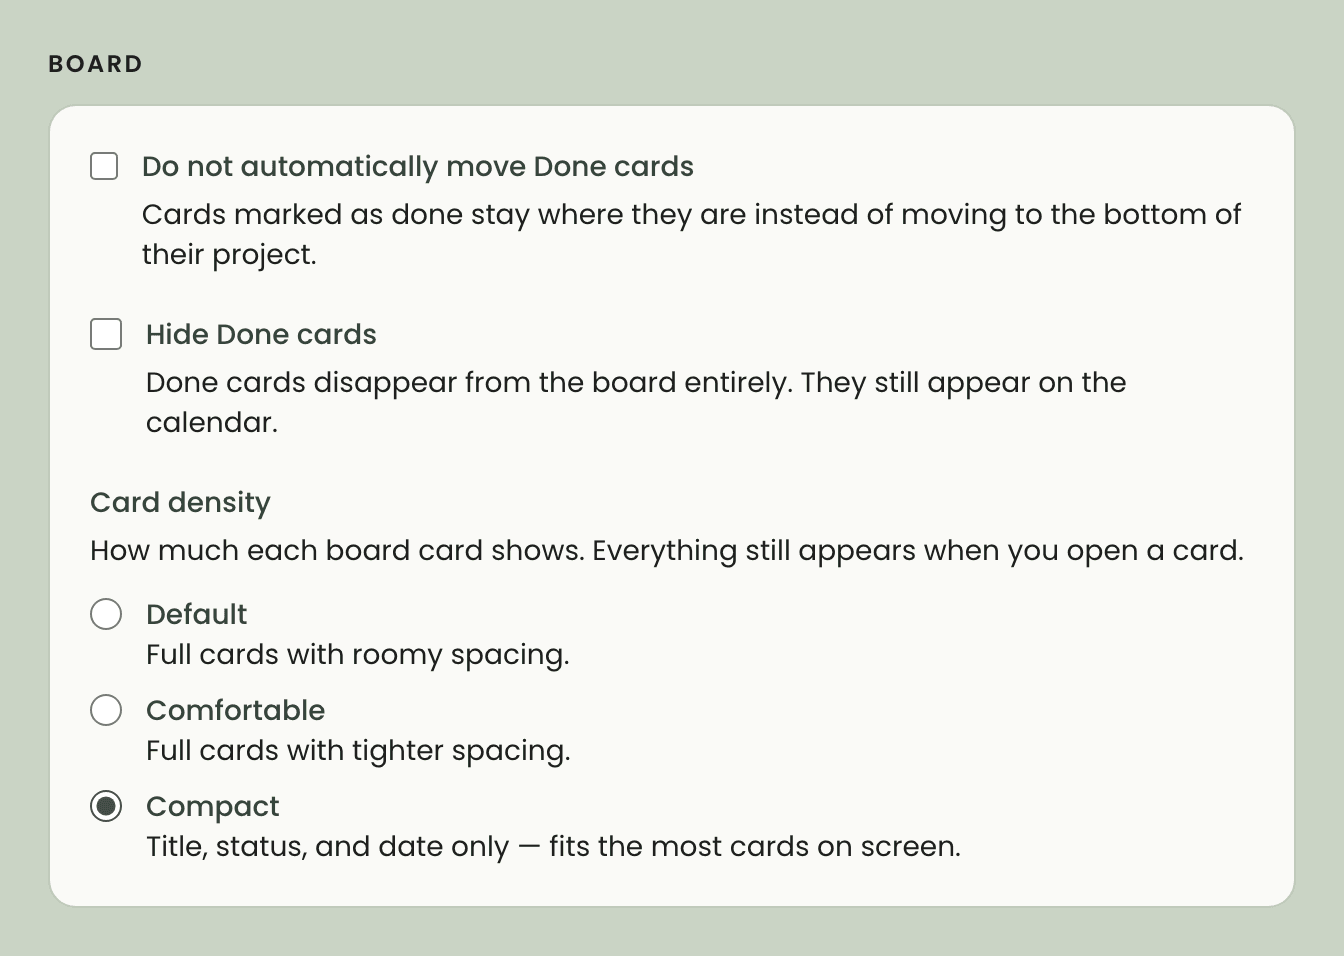
Open settings from the gear icon in the header. Under Board, choose how much each card shows — from full cards down to a compact title-and-date line — and decide what happens to Done cards: by default they sink to the bottom of their column, but you can keep them in place or hide them from the board entirely.
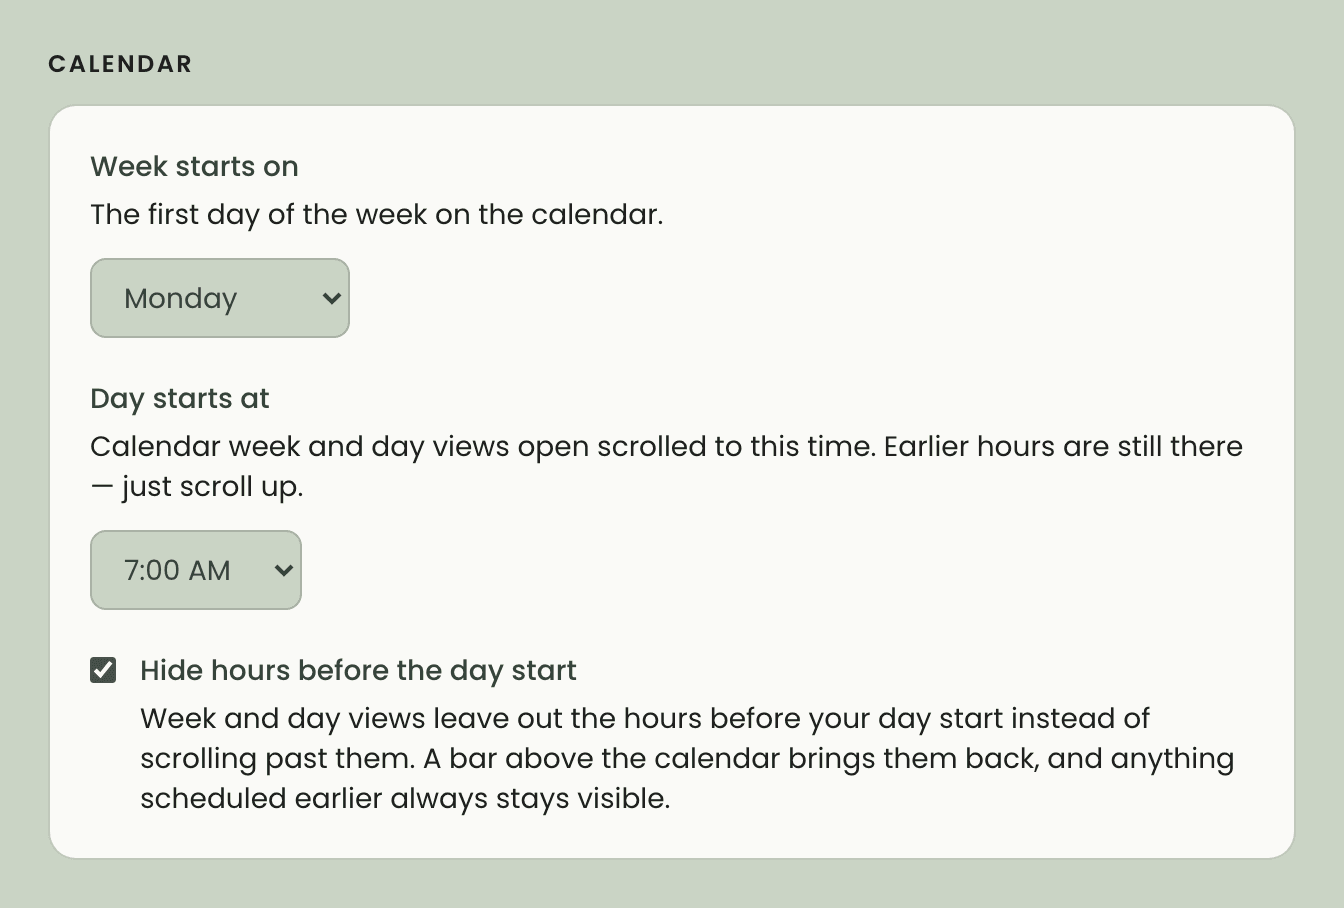
Not every week starts on Sunday, and not every day starts at nine. Under Calendar, pick the day your week begins and the hour your day starts — the calendar’s week and day views open scrolled right to it. If you’d rather not see the early hours at all, hide them: the grid starts when your day does, and anything scheduled earlier still shows up.
7. Subscribe from your calendar app
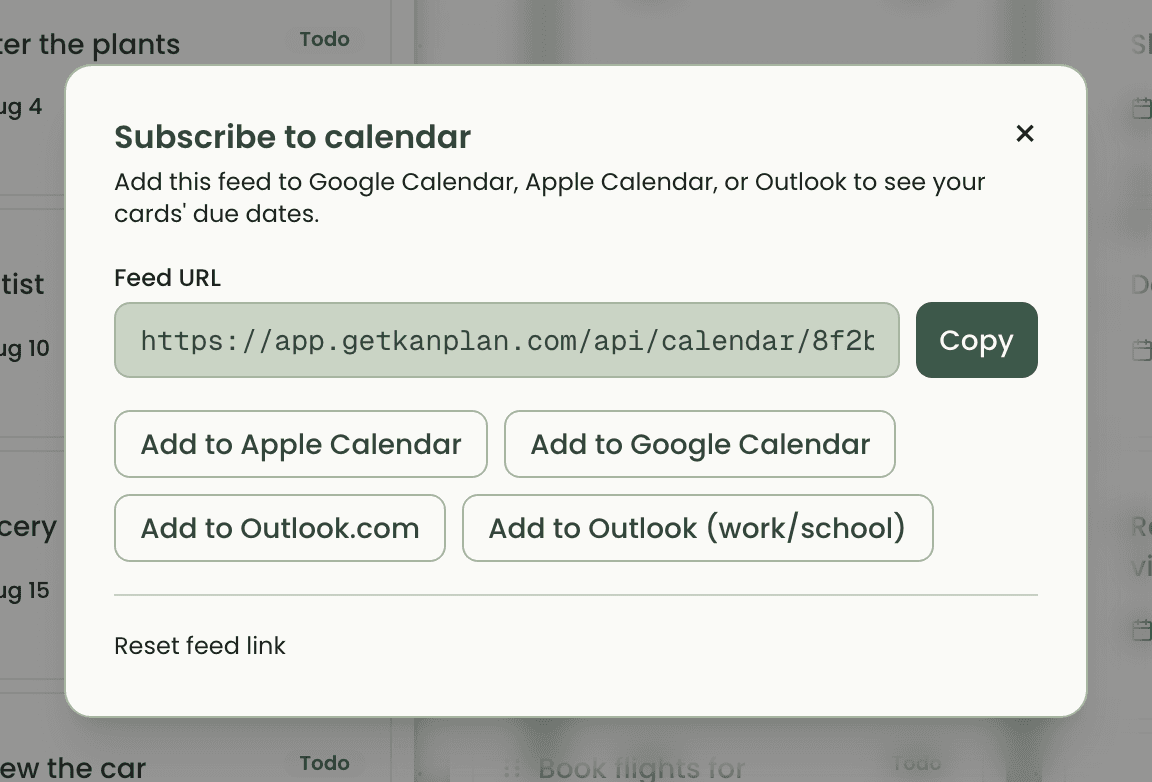
Click Subscribe above the calendar to get your private feed link, then add it to Google Calendar, Apple Calendar, or Outlook. Your dated cards will show up alongside the rest of your life and stay in sync as you edit the board.
Tips
Toggle dark mode from the moon icon in the header. Past cards collapse out of the way on the board automatically. And if your feed link ever leaks, rotate it from settings — the old link stops working immediately.